Published - 5 years ago ( Updated - 5 years ago )
AP provides WPA2/EAP function, but it won't work?
This article introduces how I can quickly build a Radius server through docker's ubuntu:21.04 image.
Related applications such as WPA2/EAP of Wifi.
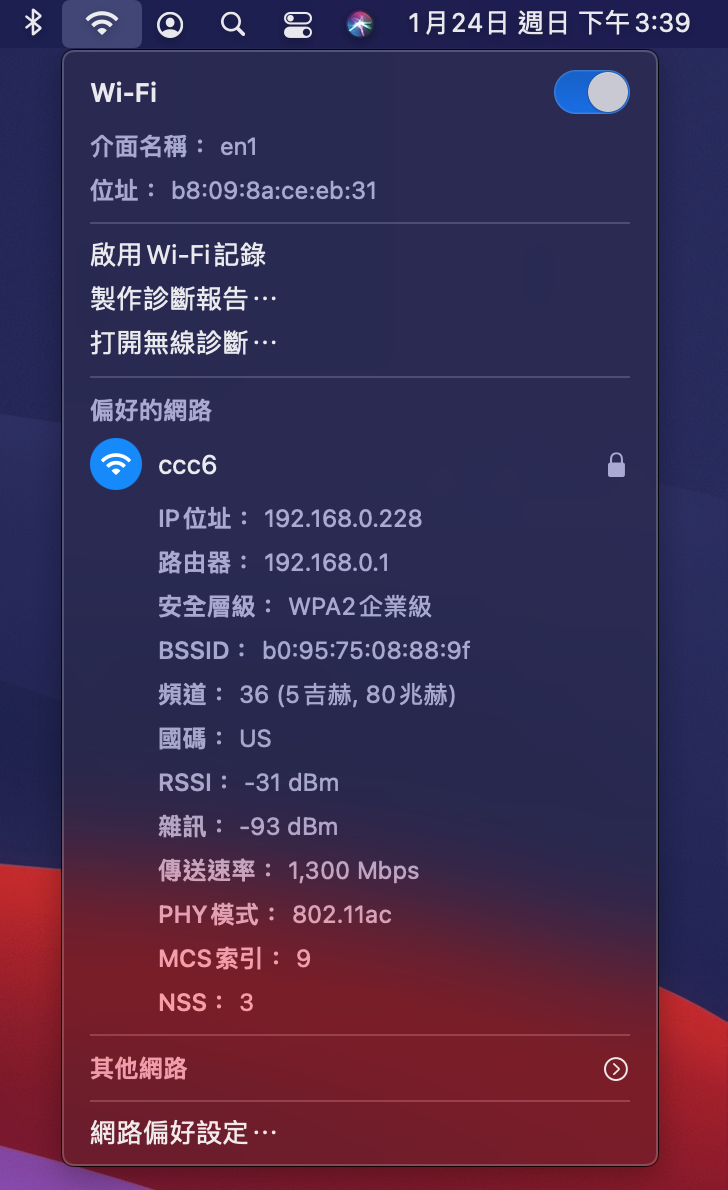
Let's take a look at my trial results first:
GitHub is here to download:
https://github.com/DevinY/radius
In principle, please follow the README.md, and here I will explain more detailed instructions:
Before we start, first we need to have docker.
1. After downloading, enter the radius directory, and use the build function of docker-compose to create an image.
In the case that the directory does not change, the image of radius_radius will be generated.
2. Generate a self-signed certificate, execute it in the radius directory, and two files server.crt and server.key will be generated.
You can adjust the content of subj by yourself. I don’t want to change the voucher all day long. Here it is set to 3650 days.
In addition, the key here does not have a password. I think if you need a password, you can go to the container to make after the container is started, and then copy it out for use.
The directory is /etc/freeradius/3.0/certs
3. Obtain the radius configuration file. Radius shows that it is not easy to modify and view. Here I mentioned a bash to copy the configuration file.
And remove all annotations, the radius_radius behind is the name of the image.
You can see those changes I made to the original config file. :)
4. Start the container
-h db is the service name of the database container. It is required in some environments and not in some environments. It will avoid unnecessary problems, so just type it.
Database password, please adjust it yourself.
7. Enter the radius container and create a schema
After completing the above database creation, we can create the schema of the radius server backend database mysql, execute the following to enter
The container service of radius.
We can jump out with control+d.
Paste the command below to create all the required tables to the radius database, if you used a custom password in step 6
, remember to adjust the part of the command and password below.
Back to the host side, my repo, I provide a simple command to generate a radius account and password.
The first parameter is the account number and the second parameter is the password.
Of course, in the Radius environment, there are many platforms to choose from for the back-end database.
10. Modify clients.conf
You can change the secret you want to use.
Since the ip is random in the container, I use *. If you want to use a specific IP, it depends on your execution environment.
If you have a certain understanding of docker, I think it is absolutely not difficult. When your host is in a Linux environment,
It can be done through network_mode: host, of course you need to adjust docker-compose.yml yourself,
If you don't know about it, don't waste your time, let him be ipaddr = * number.
Delete the dialect and driver, and paste the following five lines.
original content
Restarting the container with the argument --remove-orphans seems to be fine at startup.
Sometimes it fails to start, not sure why.
We can use the command below to check the status and see two Ups, I think there is probably no problem.
"chmod 750 file name" adjustment, especially eap, clients.conf, default and other files.
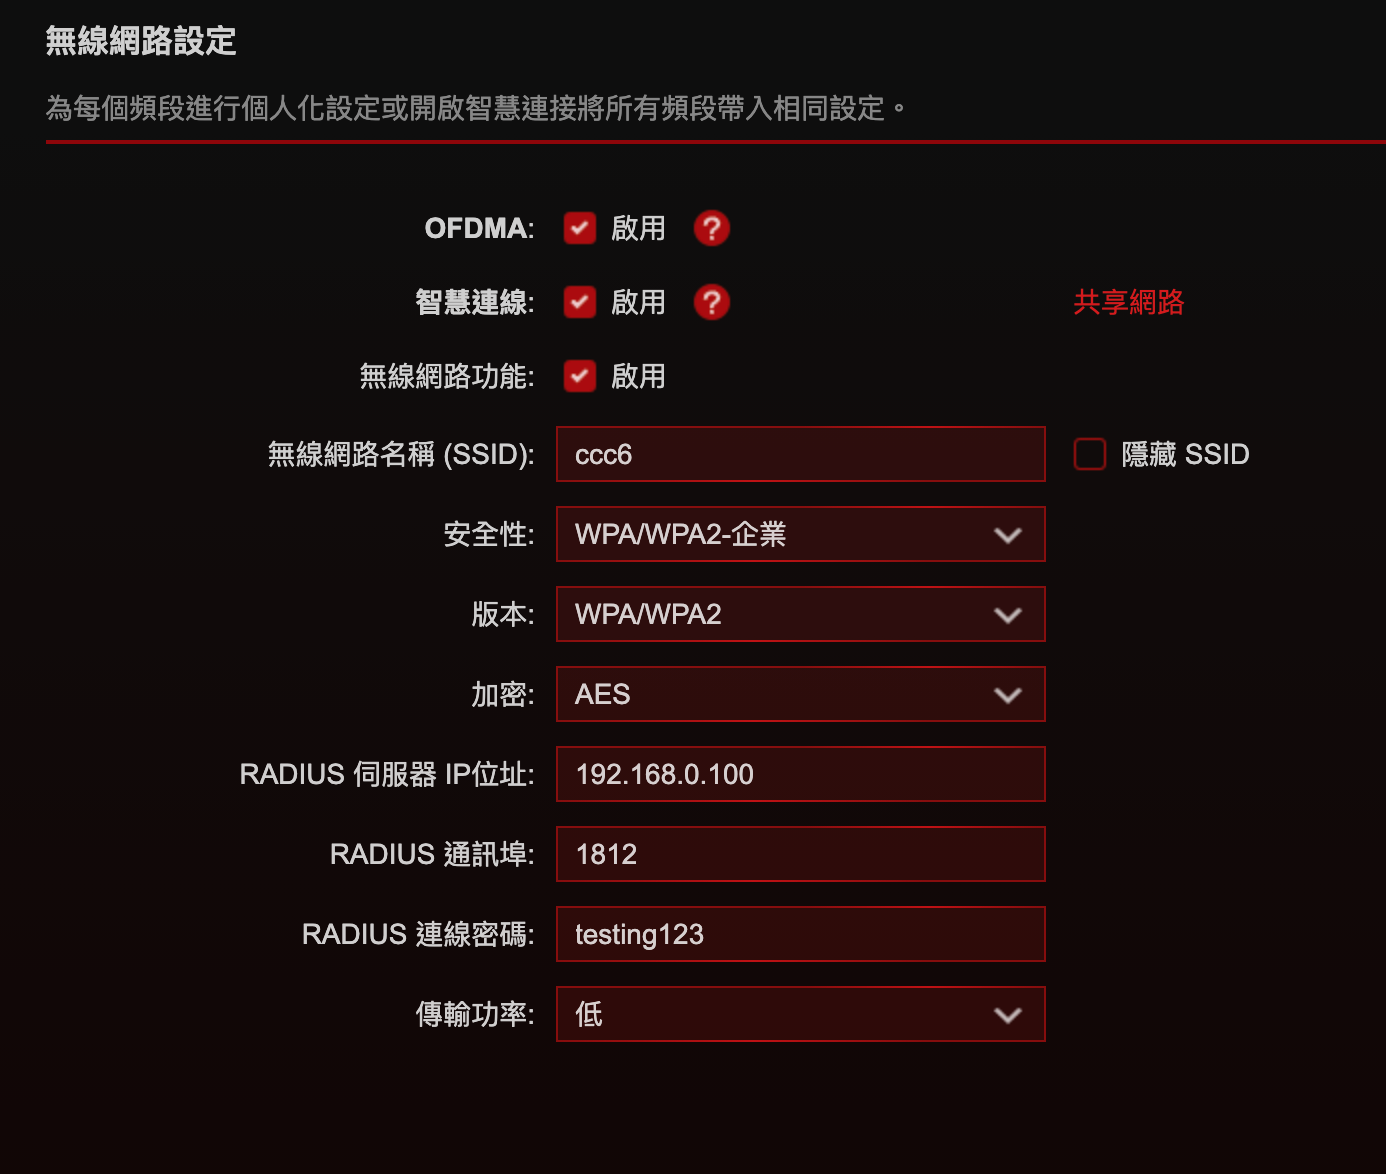
Finally, through the logs mode above, we can observe whether the connection result of the Client is normal. The settings in the AP are as follows, the schematic diagram:
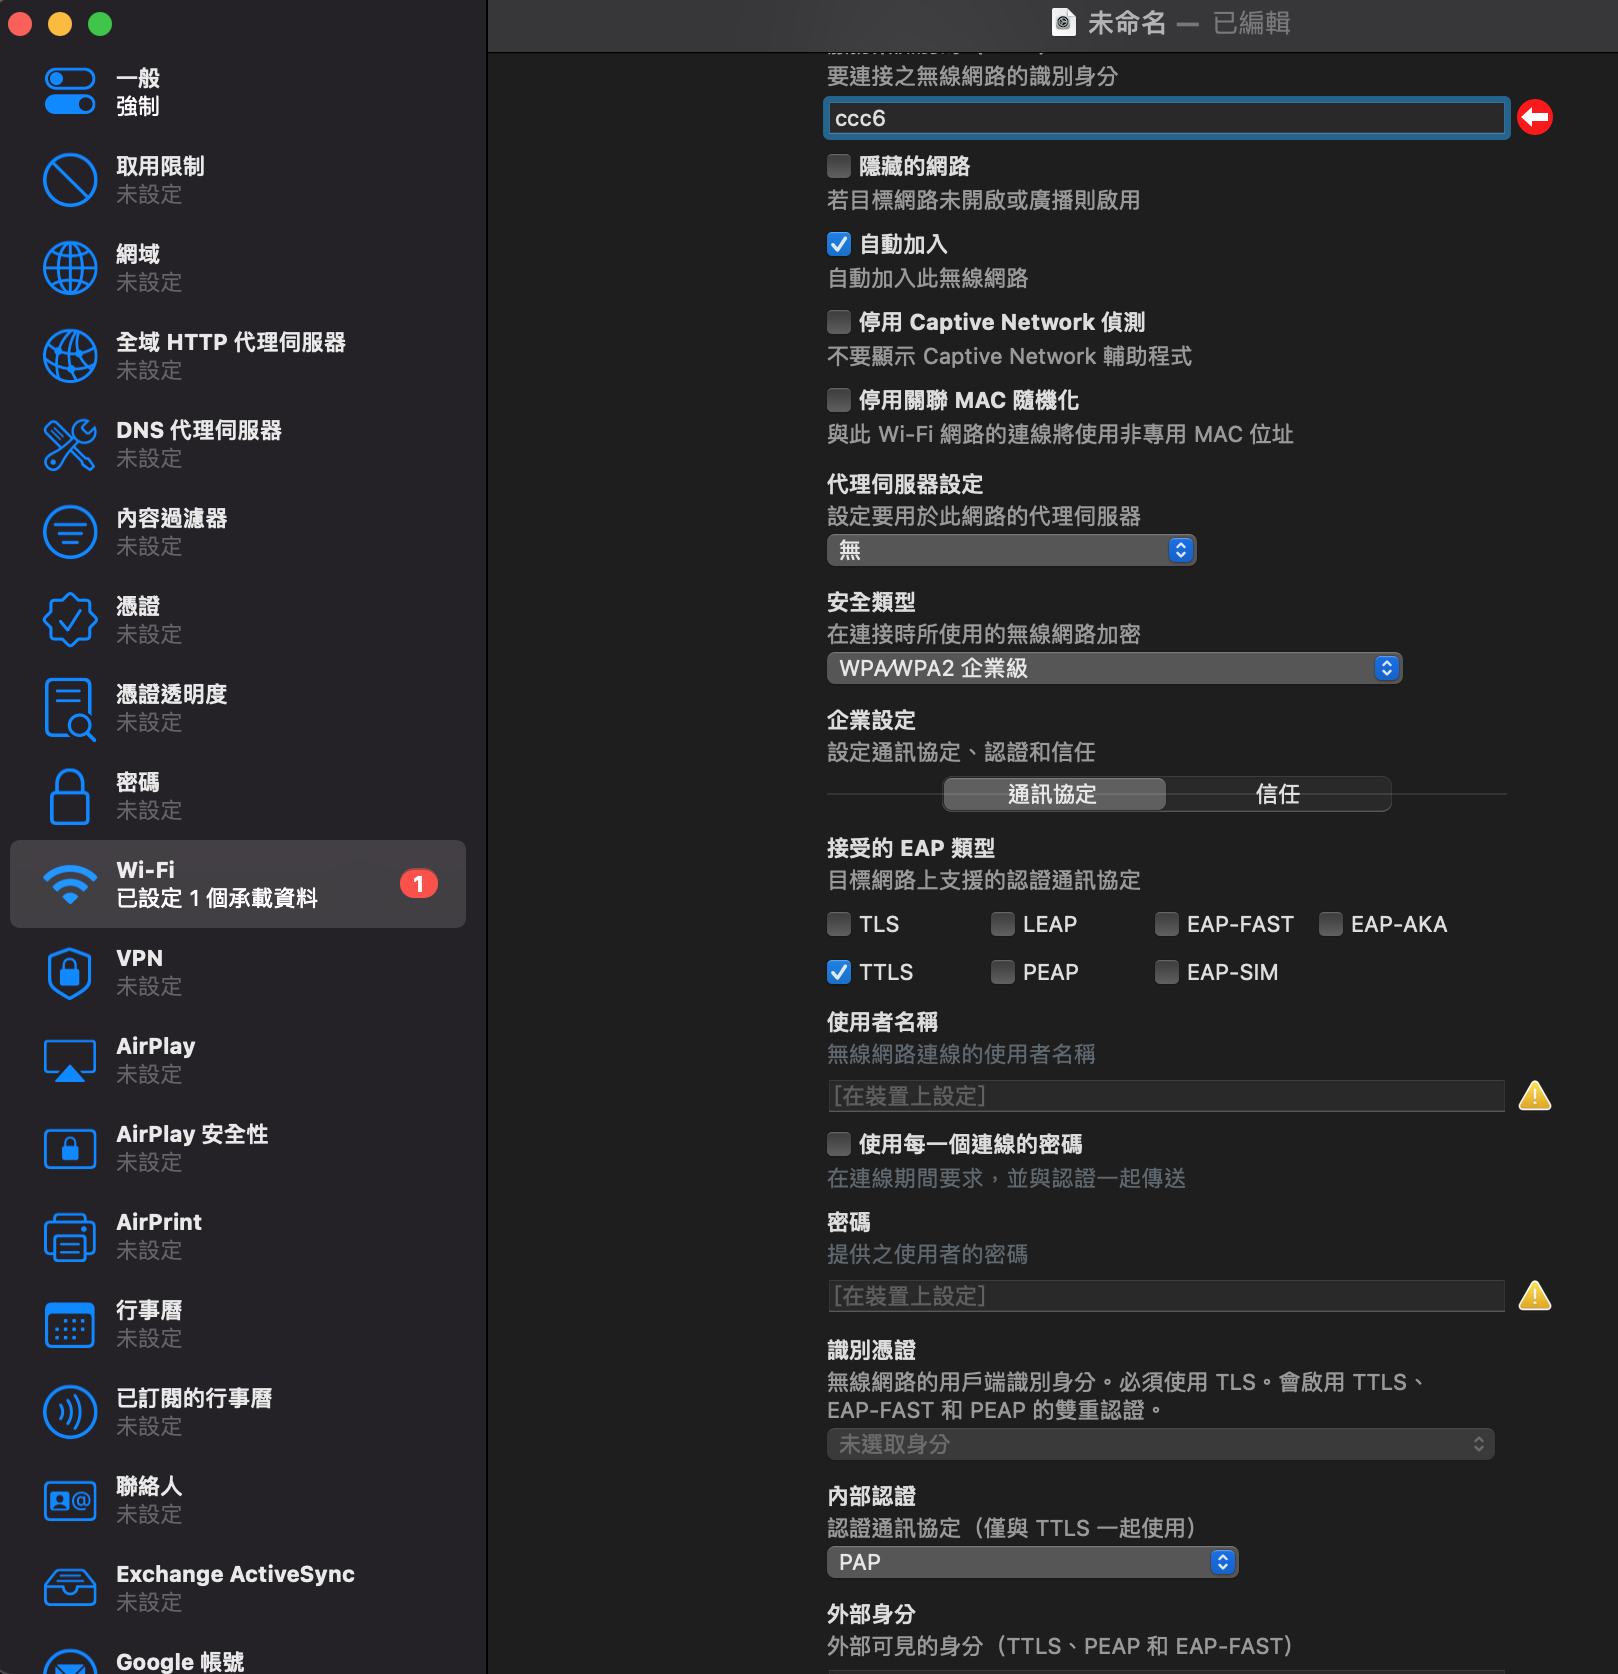
In MacOS and iOS environments, Apple Configurator2's drawing files are required to connect normally.
As large as the content is as follows:
Additional testing of EAP-TTLS functionality
1. Enter the radius container
This article introduces how I can quickly build a Radius server through docker's ubuntu:21.04 image.
Related applications such as WPA2/EAP of Wifi.
Let's take a look at my trial results first:
GitHub is here to download:
https://github.com/DevinY/radius
In principle, please follow the README.md, and here I will explain more detailed instructions:
Before we start, first we need to have docker.
1. After downloading, enter the radius directory, and use the build function of docker-compose to create an image.
In the case that the directory does not change, the image of radius_radius will be generated.
docker-compose build --no-cache
If you don't want to use the name of this image, the radius service in docker-compose.yml remember to specify the image name of your own build.2. Generate a self-signed certificate, execute it in the radius directory, and two files server.crt and server.key will be generated.
You can adjust the content of subj by yourself. I don’t want to change the voucher all day long. Here it is set to 3650 days.
In addition, the key here does not have a password. I think if you need a password, you can go to the container to make after the container is started, and then copy it out for use.
openssl req -x509 \
-subj '/C=TW/ST=Taiwan/L=Panchiao/CN=ccc.tc' \
-nodes -newkey rsa:2048 -keyout server.key -out server.crt -days 3650
If make in the container, you need to change at least three files ca.cnf, client.cnf and server.cnf.The directory is /etc/freeradius/3.0/certs
3. Obtain the radius configuration file. Radius shows that it is not easy to modify and view. Here I mentioned a bash to copy the configuration file.
And remove all annotations, the radius_radius behind is the name of the image.
./getconfig.sh radius_radius
In other words, if you want to know all the content or annotations, you can go to the container and watch it.
docker run --rm -ti radius_radius bash
The main configuration file is put there, you can check the bash content through cat, it should not be difficult to find.
cat getconfig.sh
In addition, in this repo, I also created a diff.html, which can be opened through a browser.You can see those changes I made to the original config file. :)
4. Start the container
docker-compose up -d
5. We can use ps to check whether it is started correctly.
docker-compose ps
Name Command State Ports
-------------------------------------------------- -------------------------------------------------- --
radius_db_1 docker-entrypoint.sh mysqld Up 0.0.0.0:33060->3306/tcp
radius_radius_1 /usr/sbin/freeradius -X Up 0.0.0.0:1812->1812/udp, 0.0.0.0:1813->1813/udp
Sixth, confirm that the db is up, and then you can create the DB.-h db is the service name of the database container. It is required in some environments and not in some environments. It will avoid unnecessary problems, so just type it.
docker-compose exec db mysql -h db -e "create database radius"
docker-compose exec db mysql -h db -e "grant all on radius.* to 'radius'@'%' identified by 'hlOTg2ZmNk'"
The first line of command creates the radius database, and the second line authorizes the radius user to have full authority to access the radius database.Database password, please adjust it yourself.
7. Enter the radius container and create a schema
After completing the above database creation, we can create the schema of the radius server backend database mysql, execute the following to enter
The container service of radius.
docker-compose exec radius bash
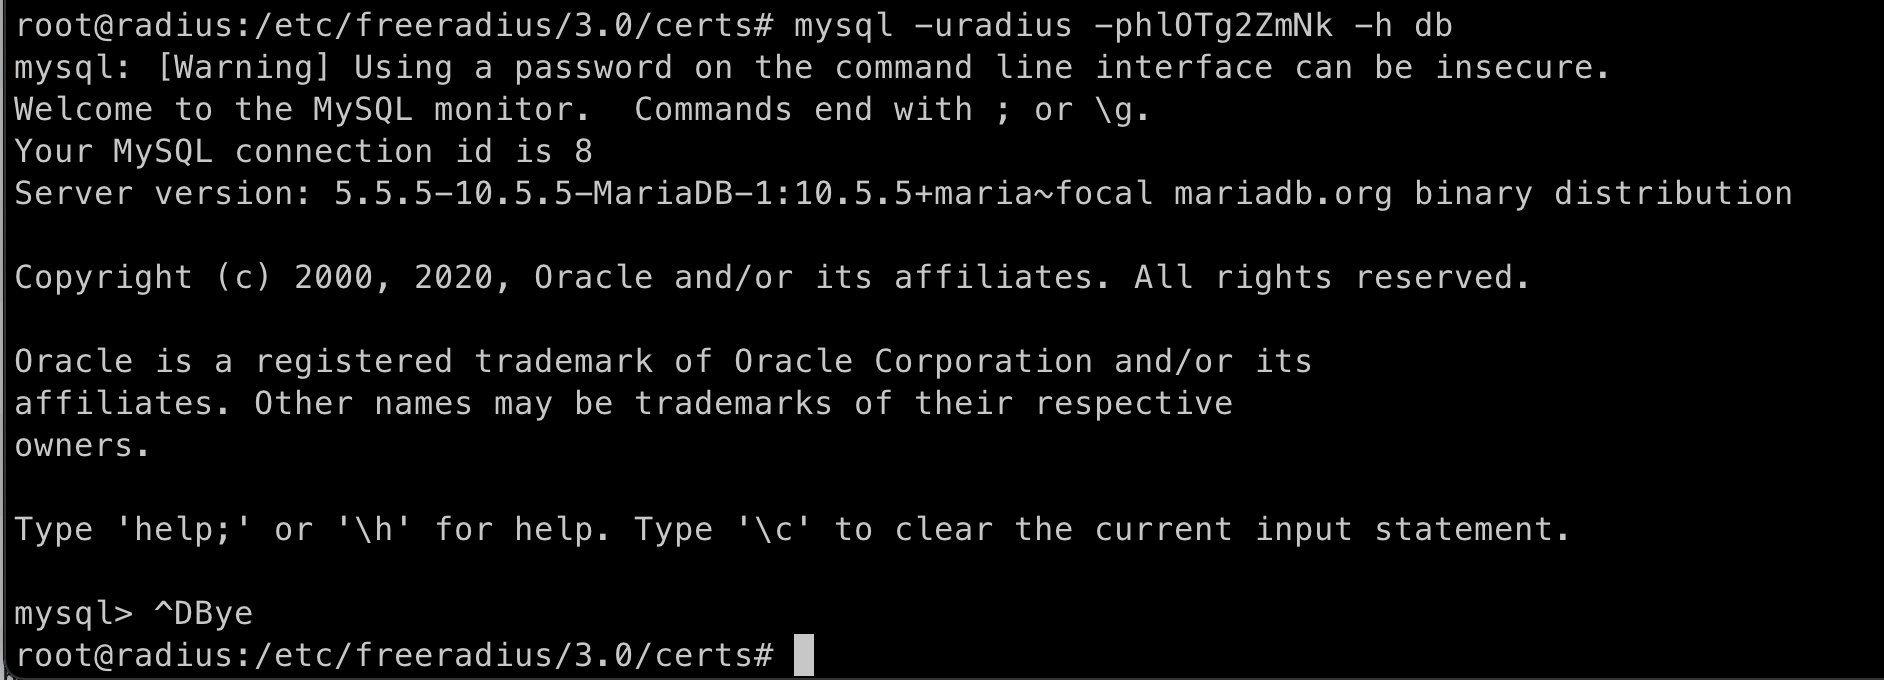
Eight, you can first test to see if there is a problem with the db service.
mysql -uradius -phlOTg2ZmNk -h db
The password and parameters do not need spaces, so the above command is correct. "hlOTg2ZmNk" is the password. After entering normally,We can jump out with control+d.
Paste the command below to create all the required tables to the radius database, if you used a custom password in step 6
, remember to adjust the part of the command and password below.
mysql -uradius -phlOTg2ZmNk -h db radius < /etc/freeradius/3.0/mods-config/sql/main/mysql/schema.sql
9. Create an accountBack to the host side, my repo, I provide a simple command to generate a radius account and password.
The first parameter is the account number and the second parameter is the password.
./adduser.php devin test
radius provides quite a few attribute types, as shown in the following table:
       Header	    Attribute		Description
------ --------- -----------
{clear} Cleartext-Password Clear-text passwords
{cleartext} Cleartext-Password Clear-text passwords
{crypt} Crypt-Password Unix-style "crypt"ed passwords
{md5} MD5-Password MD5 hashed passwords
{base64_md5} MD5-Password MD5 hashed passwords
{smd5} SMD5-Password MD5 hashed passwords, with a salt
{sha} SHA-Password SHA1 hashed passwords
SHA1-Password SHA1 hashed passwords
{ssha} SSHA-Password SHA1 hashed passwords, with a salt
{sha2} SHA2-Password SHA2 hashed passwords
{sha224} SHA2-Password SHA2 hashed passwords
{sha256} SHA2-Password SHA2 hashed passwords
{sha384} SHA2-Password SHA2 hashed passwords
{sha512} SHA2-Password SHA2 hashed passwords
{ssha224} SSHA2-224-Password SHA2 hashed passwords, with a salt
{ssha256} SSHA2-256-Password SHA2 hashed passwords, with a salt
{ssha384} SSHA2-384-Password SHA2 hashed passwords, with a salt
{ssha512} SSHA2-512-Password SHA2 hashed passwords, with a salt
{nt} NT-Password Windows NT hashed passwords
{nthash} NT-Password Windows NT hashed passwords
{md4} NT-Password Windows NT hashed passwords
{x-nthash} NT-Password Windows NT hashed passwords
{ns-mta-md5} NS-MTA-MD5-Password Netscape MTA MD5 hashed passwords
{x-orcllmv} LM-Password Windows LANMAN hashed passwords
{X- orclntv} NT-Password Windows NT hashed passwords
I chose to use mysql as the backend because I think it is more convenient to update, at least I think it will be easier than ldap..:pOf course, in the Radius environment, there are many platforms to choose from for the back-end database.
10. Modify clients.conf
You can change the secret you want to use.
Since the ip is random in the container, I use *. If you want to use a specific IP, it depends on your execution environment.
If you have a certain understanding of docker, I think it is absolutely not difficult. When your host is in a Linux environment,
It can be done through network_mode: host, of course you need to adjust docker-compose.yml yourself,
If you don't know about it, don't waste your time, let him be ipaddr = * number.
client wifi {
ipaddr = *
secret = testing123
}
Eleven, modify the sql fileDelete the dialect and driver, and paste the following five lines.
original content
dialect = "sqlite"
driver = "rlm_sql_null"
Change to (if the database password is changed in step 6, please adjust it yourself)
dialect = "mysql"
driver = "rlm_sql_${dialect}"
server = "db"
port = 3306
login = "radius"
password = "hlOTg2ZmNk"
12. Restart the testRestarting the container with the argument --remove-orphans seems to be fine at startup.
Sometimes it fails to start, not sure why.
docker-compose down --remove-orphans
docker-compose up -d
13. View service functionsWe can use the command below to check the status and see two Ups, I think there is probably no problem.
docker-compose ps
Name Command State Ports
-------------------------------------------------- -------------------------------------------------- --
radius_db_1 docker-entrypoint.sh mysqld Up 0.0.0.0:33060->3306/tcp
radius_radius_1 /usr/sbin/freeradius -X Up 0.0.0.0:1812->1812/udp, 0.0.0.0:1813->1813/udp
If the radius fails to start successfully, you can re-execute the twelfth part to see, or check the log first, the command is as follows:
docker-compose logs -f radius
For example, I tried to install on my Synology NAS at home, but the file permissions were too open and failed to start. At this time, you can use"chmod 750 file name" adjustment, especially eap, clients.conf, default and other files.
Finally, through the logs mode above, we can observe whether the connection result of the Client is normal. The settings in the AP are as follows, the schematic diagram:
In MacOS and iOS environments, Apple Configurator2's drawing files are required to connect normally.
As large as the content is as follows:
Additional testing of EAP-TTLS functionality
1. Enter the radius container
docker-compose exec radius bash
2. Files required for installation
apt install -y build-essential pkg-config libnl-3-dev libssl-dev libnl-genl-3-dev
3. Obtain the source of the test, and paste the instructions in turn
#下載souce
wget https://w1.fi/releases/wpa_supplicant-2.7.tar.gz

# Unzip and enter the directory
tar zxvf wpa_supplicant-2.7.tar.gz && cd wpa_supplicant-2.7/wpa_supplicant

#Create and change .config start CONFIG_EAPOL_TEST=y
sed 's/#CONFIG_EAPOL_TEST=y/CONFIG_EAPOL_TEST=y/g' defconfig > .config

#Compile and install eapol_test
make eapol_test; cp eapol_test /usr/local/bin
Fourth, the establishment of test.conf test file. Please use the account and password you created yourself.
network={
ssid="SSID_OF_THE_WIFI_NETWORK"
key_mgmt=WPA-EAP
eap=TTLS
identity="devin"
anonymous_identity="anonymous"
password="test"
phase2="auth=PAP"
eapol_flags=3
}
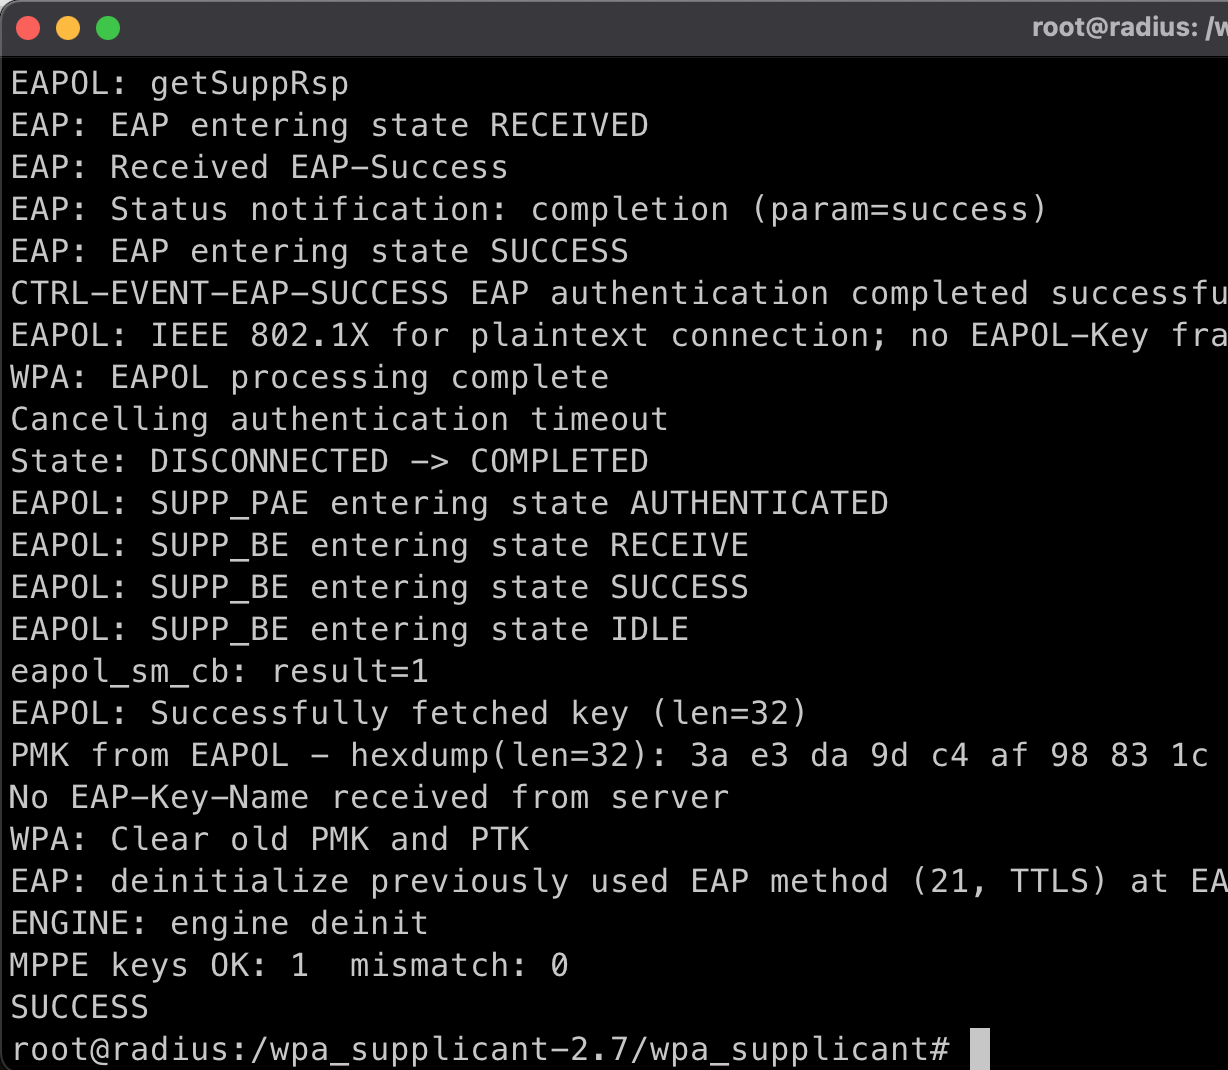
5. Execute command test
eapol_test -c test.conf -a 127.0.0.1 -p 1812 -s testing123
Execution results, if you see SUCCESS, it means the test is successful :)


No Comment
Post your comment